Confirm
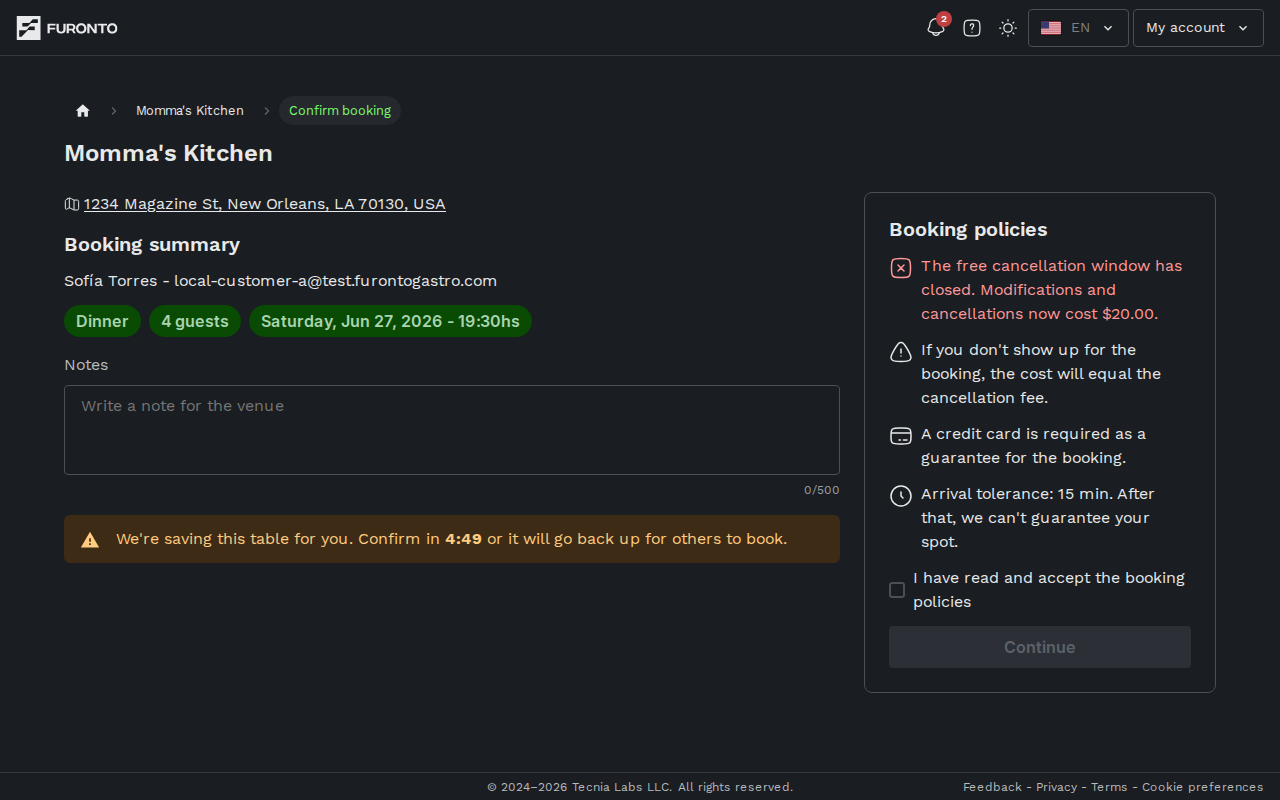
This is the last step before your booking is locked in. Take a moment to check that the date, time, and party size look right, add a note for the venue if you need to, accept the cancellation policy, and submit. If the venue requires a card guarantee, you'll move to the payment step next.
Anyone finishing a booking. You don't need an account to land here, but you'll be asked to sign in (or sign up) before the booking is created — so the venue can reach you and you can manage the booking later.
Getting there
You arrive on this page automatically after picking a date, time, and party size on the Book page and clicking Continue. The selections you made there are carried over and shown in the summary on the left.
If you refresh, close, or come back to this page later and your previous selections have expired, you'll be sent back to the venue's page with a small message — just pick a date and time again.
How it works
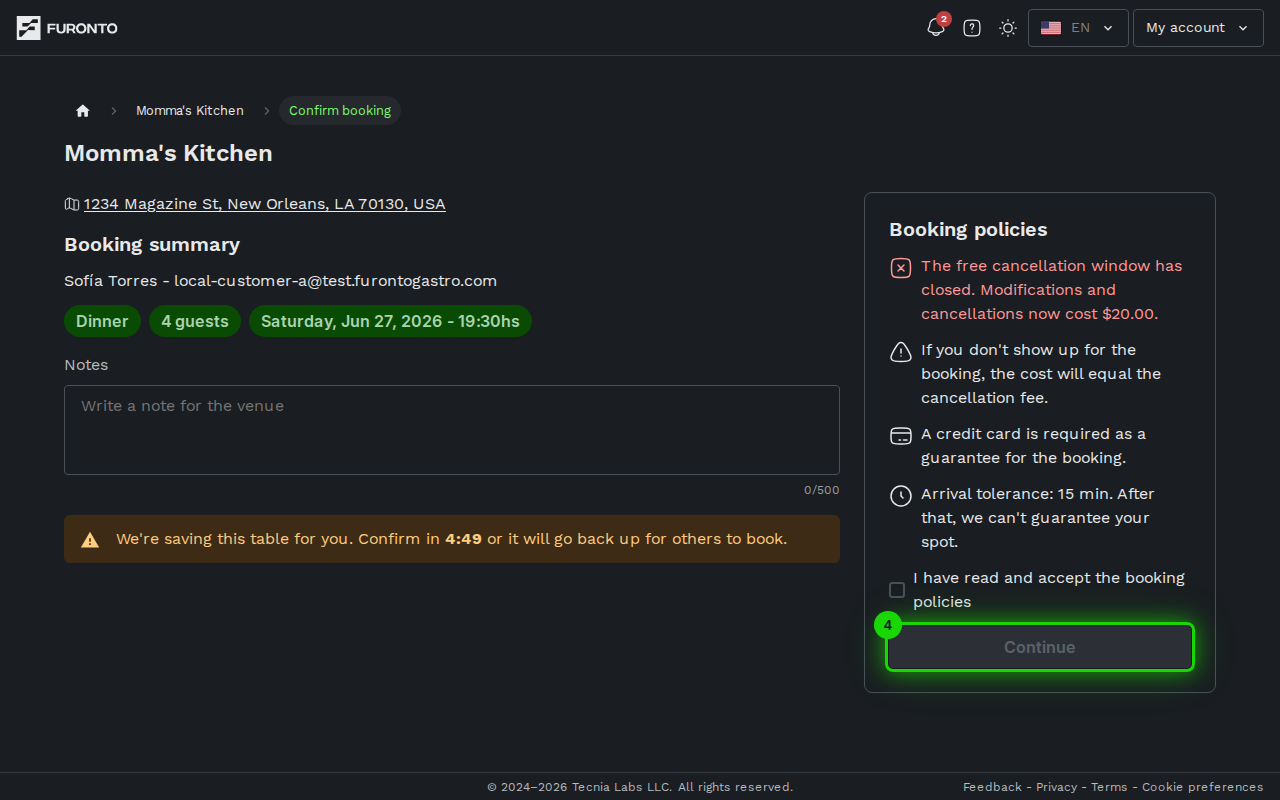
The page is split into two columns. On the left you'll see the venue's name and address, your booking summary, and a notes field. On the right there's a card with the venue's cancellation policy and the Book (or Continue) button.
Step 1: Review your booking
The My booking section lists everything you picked: your name and contact info (if you're signed in), the service type, the party size, the date and time, and the venue's tolerance window — the grace period you have to arrive after the booked time.
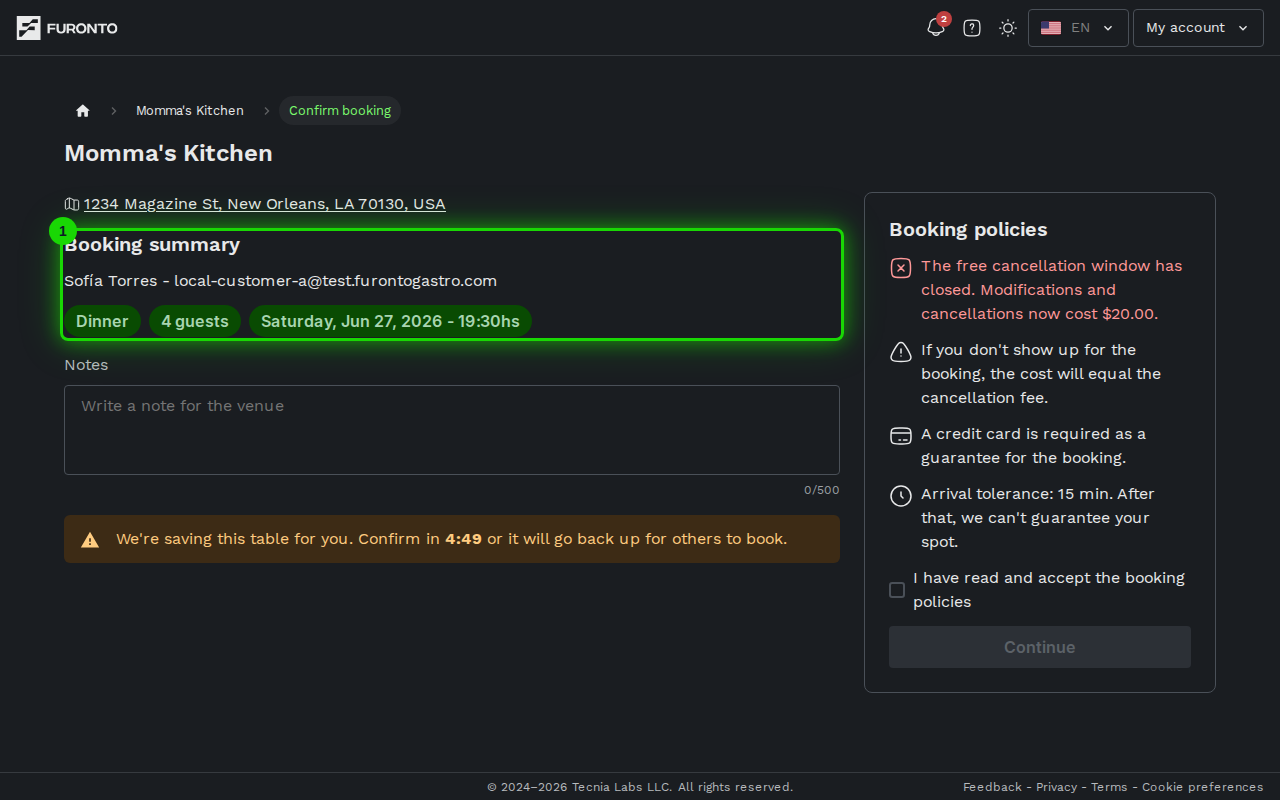
If anything looks off — wrong date, wrong number of people, wrong service — click Back in your browser to return to the previous step and adjust. Your selections stay saved while you do.
Step 2: Add a note for the venue (optional)
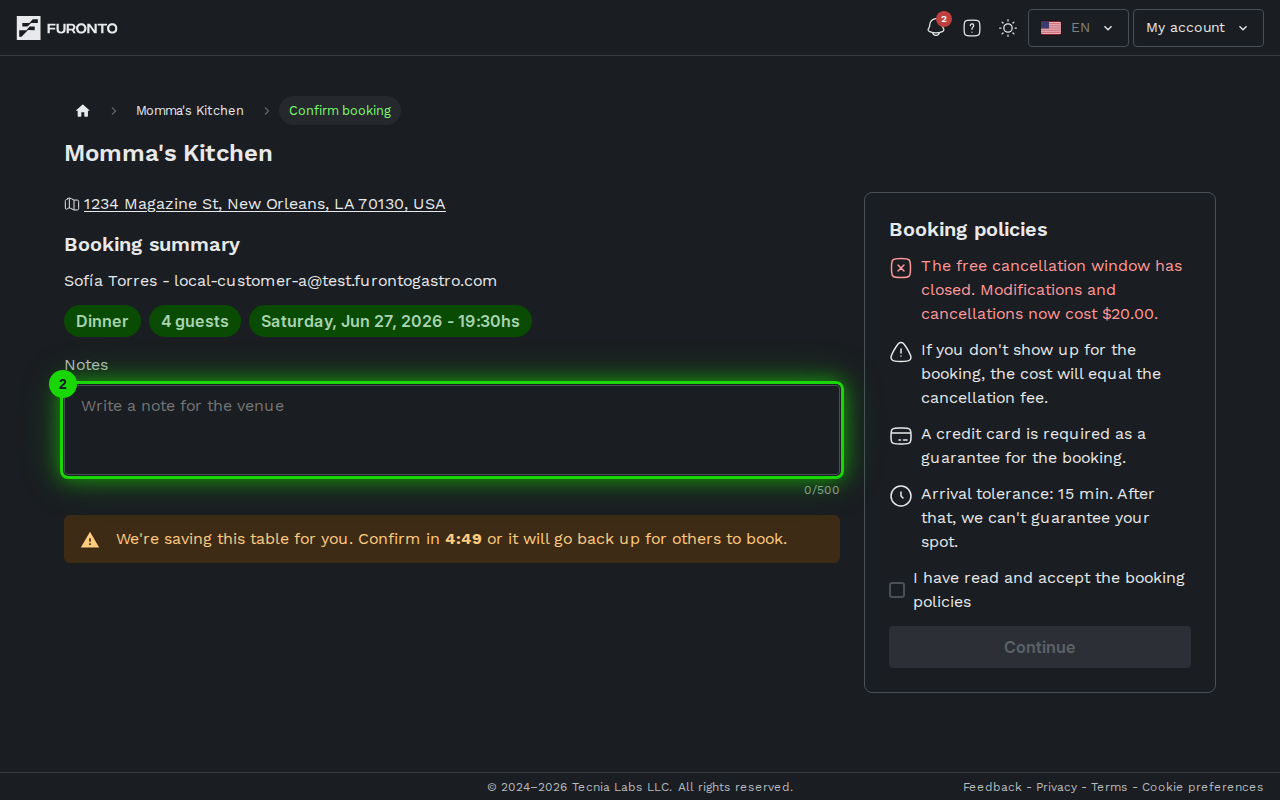
Use the Notes field below the summary to share anything the venue should know — a birthday, an allergy, an accessibility need, a preferred table. The venue sees this note on the booking detail when you arrive.
Step 3: Read the cancellation policy
The card on the right shows the venue's policy in plain language. There are two flavors depending on the venue:
- Without a guarantee — Free modifications and cancellation, with a tolerance warning if you arrive late.
- With a guarantee — Free changes up to a deadline, then a cancellation fee, plus a no-show penalty if you don't show up. A credit card is required to hold the booking.
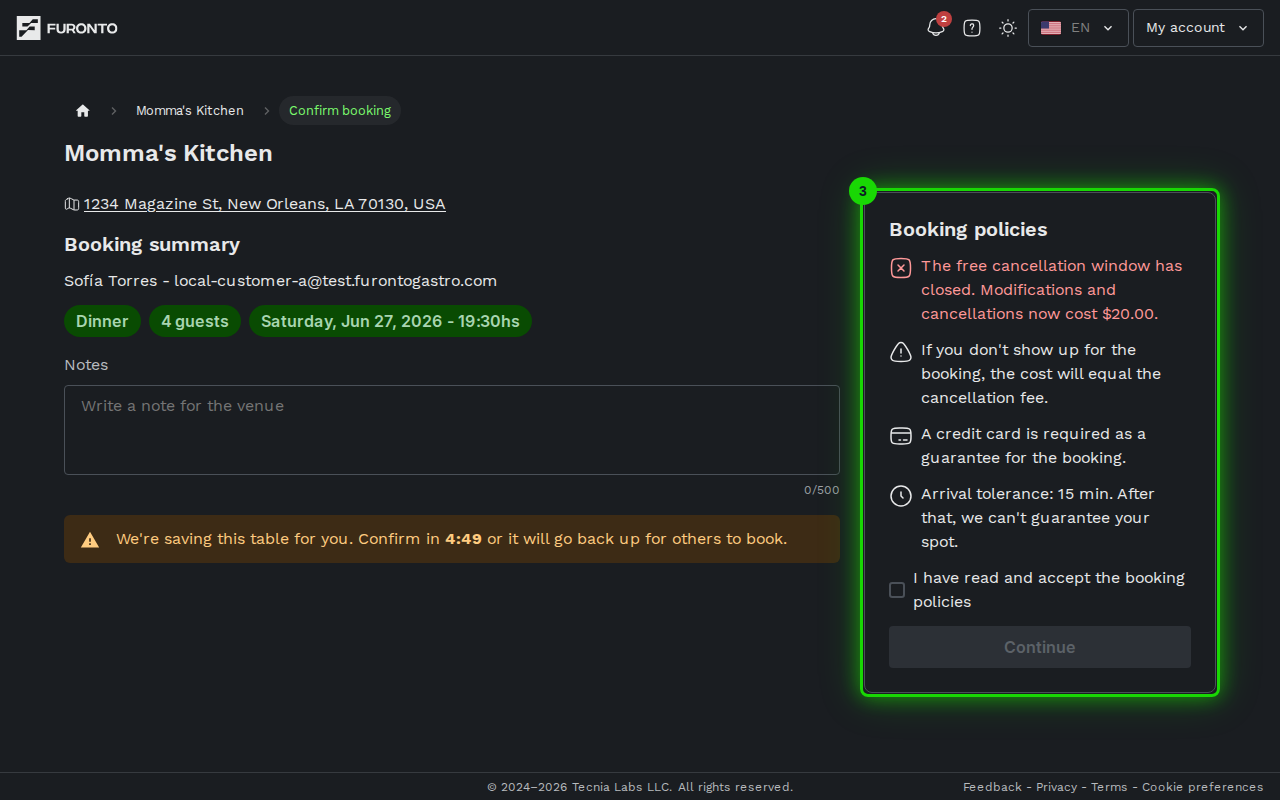
Some venues require a credit card to hold your booking. The card is not charged upfront — it's only used if you cancel late or don't show up. If your booking includes a paid add-on (a tasting menu, an event ticket), that part is charged at the time you book.
Step 4: Accept the policy and submit
Tick I have read and accept the booking policies to enable the submit button. Then click:
- Book — when no card guarantee is required. Your booking is created right away and you're sent to the success page.
- Continue — when a guarantee or paid add-on is required. You're taken to the payment step to enter your card details.
If you're not signed in, clicking the button opens a small panel where you can sign in or create an account in a few seconds. Once you're authenticated, your booking is submitted automatically — you don't need to click again.
Tips and best practices
- Double-check the date and time — The summary at the top is what the venue will receive. A quick glance now saves a phone call later.
- Keep notes short and useful — Allergies, birthdays, mobility needs, and seating preferences are the kinds of details that genuinely help the venue prepare.
- Sign in before you book — You can finish the booking either way, but signing in first makes it faster and keeps your contact info pre-filled for next time.
- Read the policy if there's a guarantee — Cancellation deadlines and no-show fees vary by venue. Make sure you're comfortable with them before submitting.
Troubleshooting
The page sent me back to the venue's profile with an "expired" message
Solution: This happens when your previous selections have expired or the page was opened without going through the booking flow first. Just pick a date, time, and party size again on the venue's page and you'll come right back here.
I see a warning that I already have a booking on this day
Solution: You already have an active booking at this venue on the same date, possibly for the same service. You can still submit if it's intentional (a separate party, for example), or go to My bookings to review the existing one.
The Book button is greyed out
Solution: You haven't ticked the I have read and accept the booking policies checkbox yet. Tick it and the button turns active.
I clicked Book but nothing happened — a sign-in panel appeared instead
Solution: That's the auth gate. The platform asks you to sign in (or sign up) before creating a booking so you can manage it later. Finish signing in and the booking is submitted automatically.
My contact info shows my email instead of my name
Solution: Your profile is missing a first or last name. The booking will still go through using whatever's available, but you can fill in your name from your Profile page so future bookings look cleaner.
Related pages
- Book — The previous step where you pick date, time, and party size
- Booking confirmed — Where you land after a successful submission
- My bookings — Manage and review all your bookings across venues