Area layout
This is where you design the floor plan of your venue. Drag tables, seats, and other resources onto a visual canvas, group them into areas like Indoor or Patio, and tell the system how many people each table can host. Once it's saved, every booking made on your site will use this layout to assign tables and check availability.
Business owners and staff with edit access. You're the one who knows where each table really is and how many people fit at each one — this page is your tool to translate that knowledge into something the booking system can use.
Getting there
From your dashboard, click Area layout in the left sidebar.
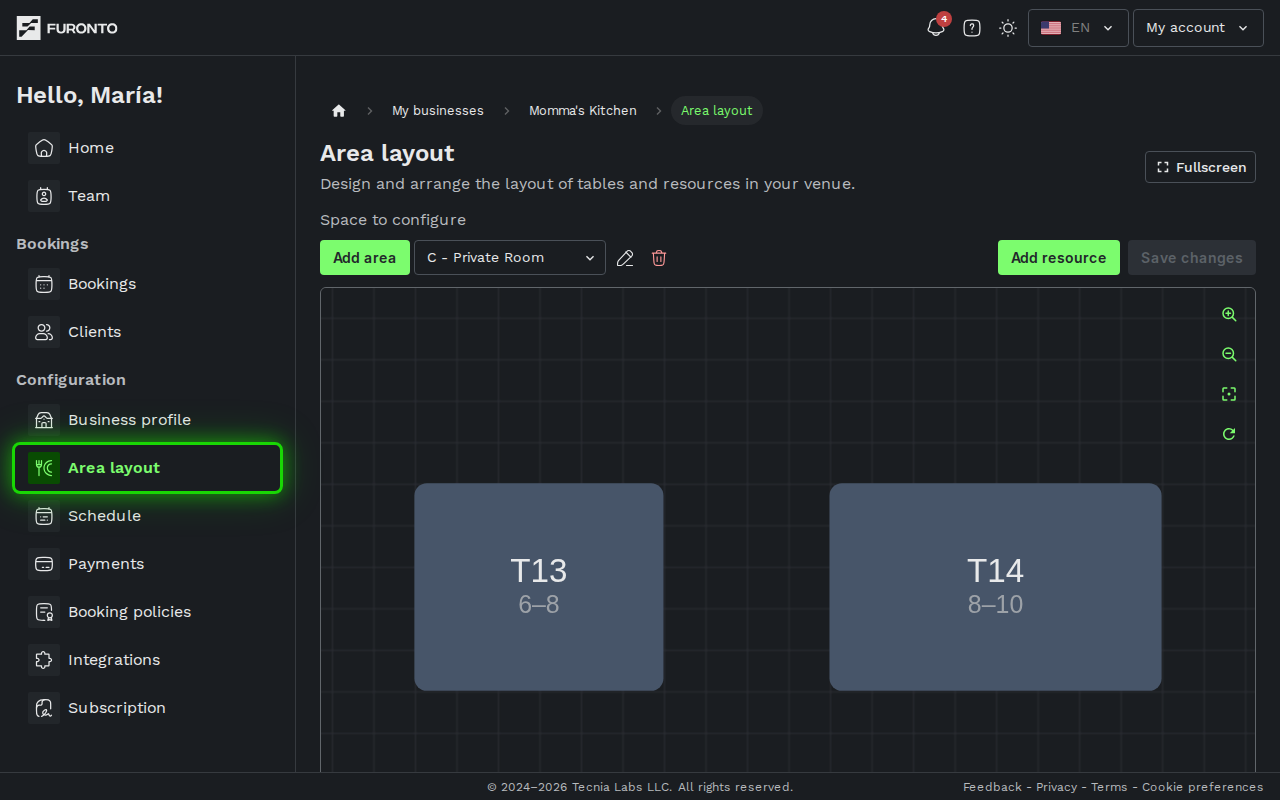
You need to be signed in and have access to the business.
How it works
The page shows your venue as a flat canvas. At the top you pick an area (or create a new one), then you add tables one by one and drag them into the position they sit in real life. When you double-click a table, a dialog opens so you can set its number, category, capacity, shape, and color. To resize or rotate a table, select it on the canvas and drag the handles around its edge.
Step 1: Pick or create an area
Use the Space to configure dropdown at the top-left to choose which area you're editing. If your venue has more than one space — say, an indoor dining room and an outdoor patio — keep them as separate areas. To add a new one, click the Add area button next to the dropdown and give it a name. Until you've created your first area, the dropdown stays empty and the button is the only thing to click.
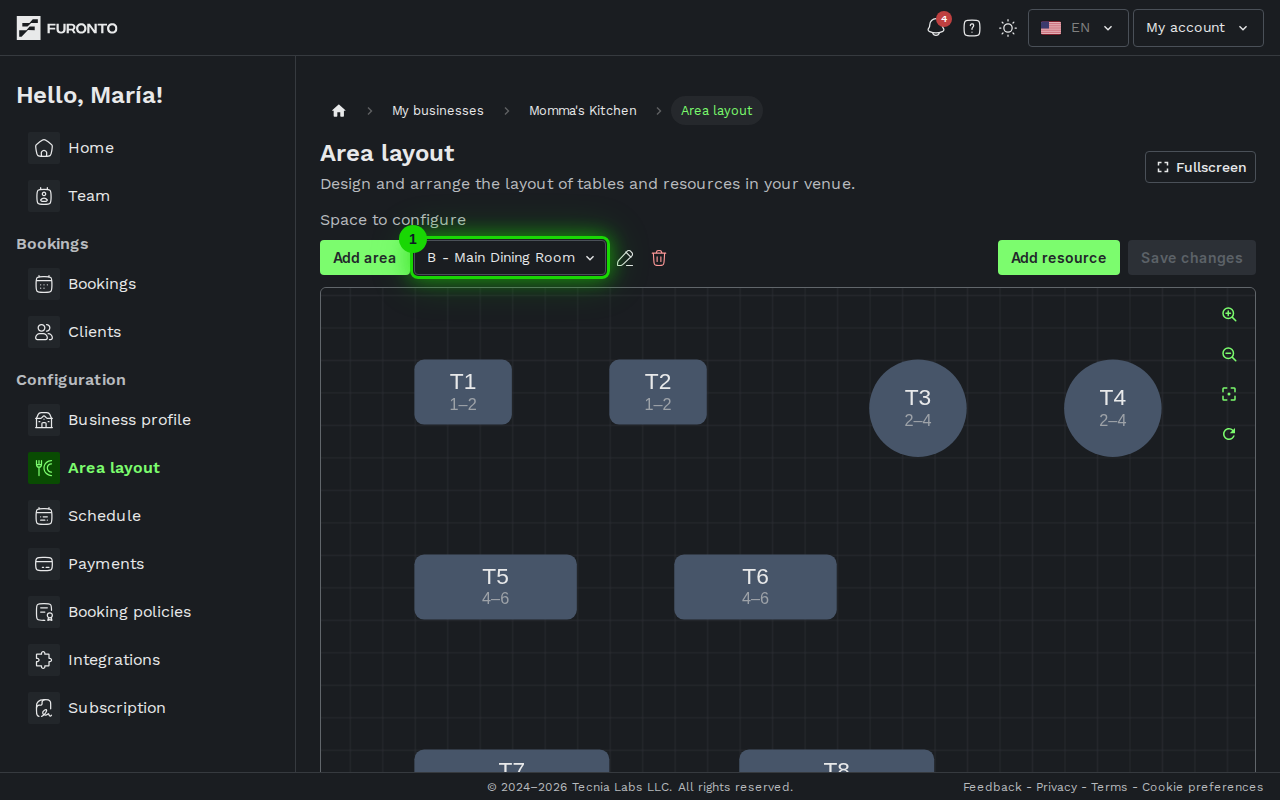
Keep area names short and recognizable. "Patio", "Bar", or "VIP room" works much better than long descriptions — these names show up everywhere your team books tables.
Step 2: Add a table to the canvas
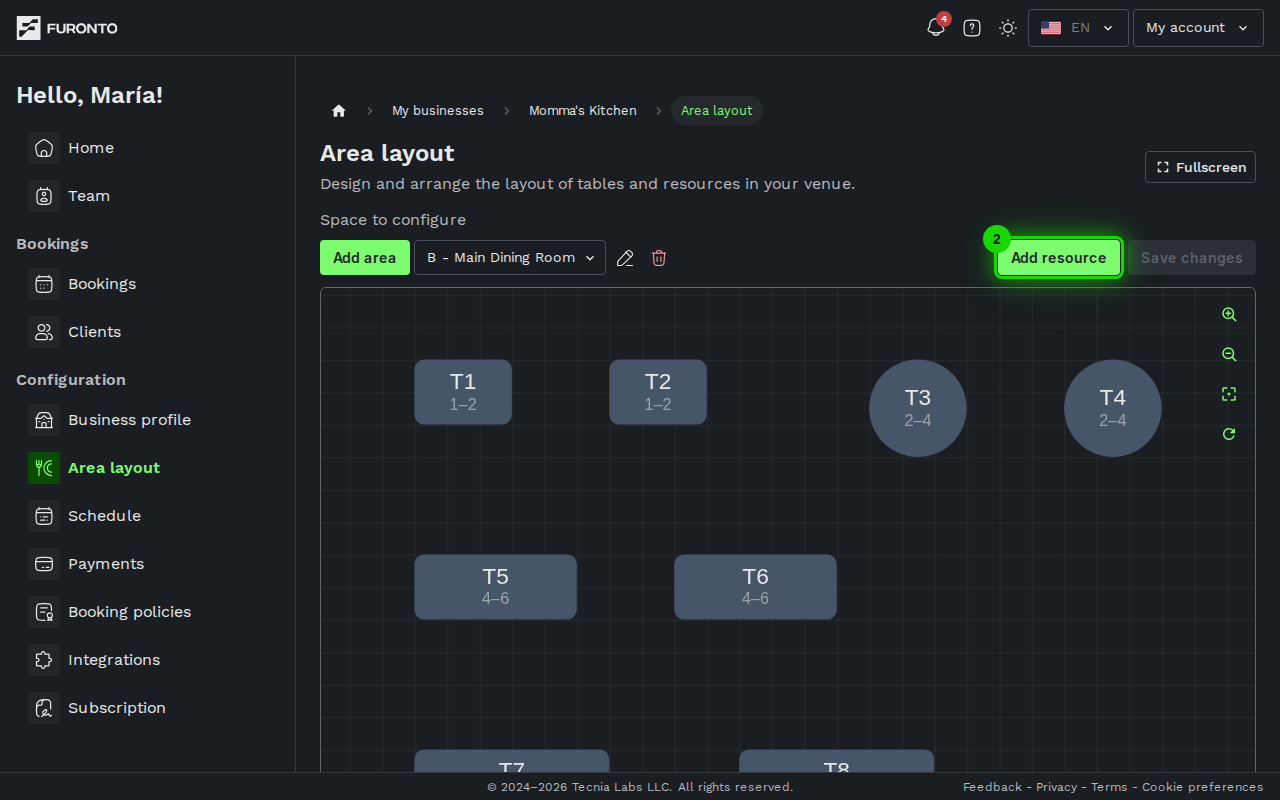
Click the green Add resource button at the top-right. A short form opens where you set the new table's number, capacity, and shape — save it and the table appears at the center of your canvas, ready to be moved.
Step 3: Move tables around
Click and hold any table, then drag it to where it sits in your venue. Tables snap to a light grid in the background, which keeps your layout neat. The system also stops you from placing one table on top of another — they'll bump apart automatically.
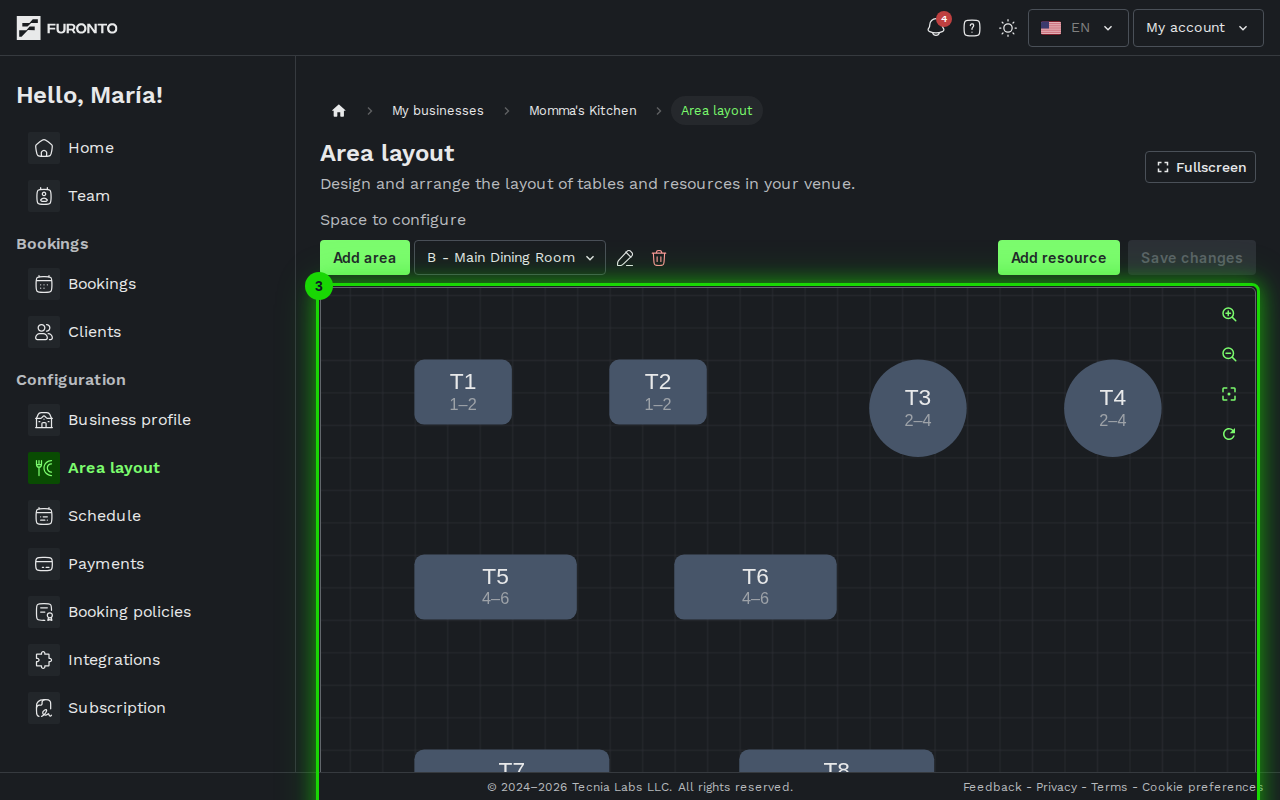
Use your mouse wheel to zoom in and out, and click and hold an empty area of the canvas to pan around. This is especially handy when you have a large venue with many tables.
Step 4: Configure a table
Double-click a table to open its configuration dialog. Here you can set:
- Table number — the label your team uses to refer to it (must be unique within the area)
- Category — table, seat, or counter
- Shape — rectangle or circle
- Color — give certain tables a distinct color if you want to spot them quickly
- Capacity — the minimum and maximum number of people who can sit at this table
- Seats lost when combined — for tables only: how many seats this table gives up on each side where it's pushed against another. Tables of the same type in the same area combine automatically for larger parties, so there's no on/off switch — this field just keeps the combined capacity honest.
To change a table's size or rotation, close the dialog, click the table once to select it, then drag the handles that appear around its edge.
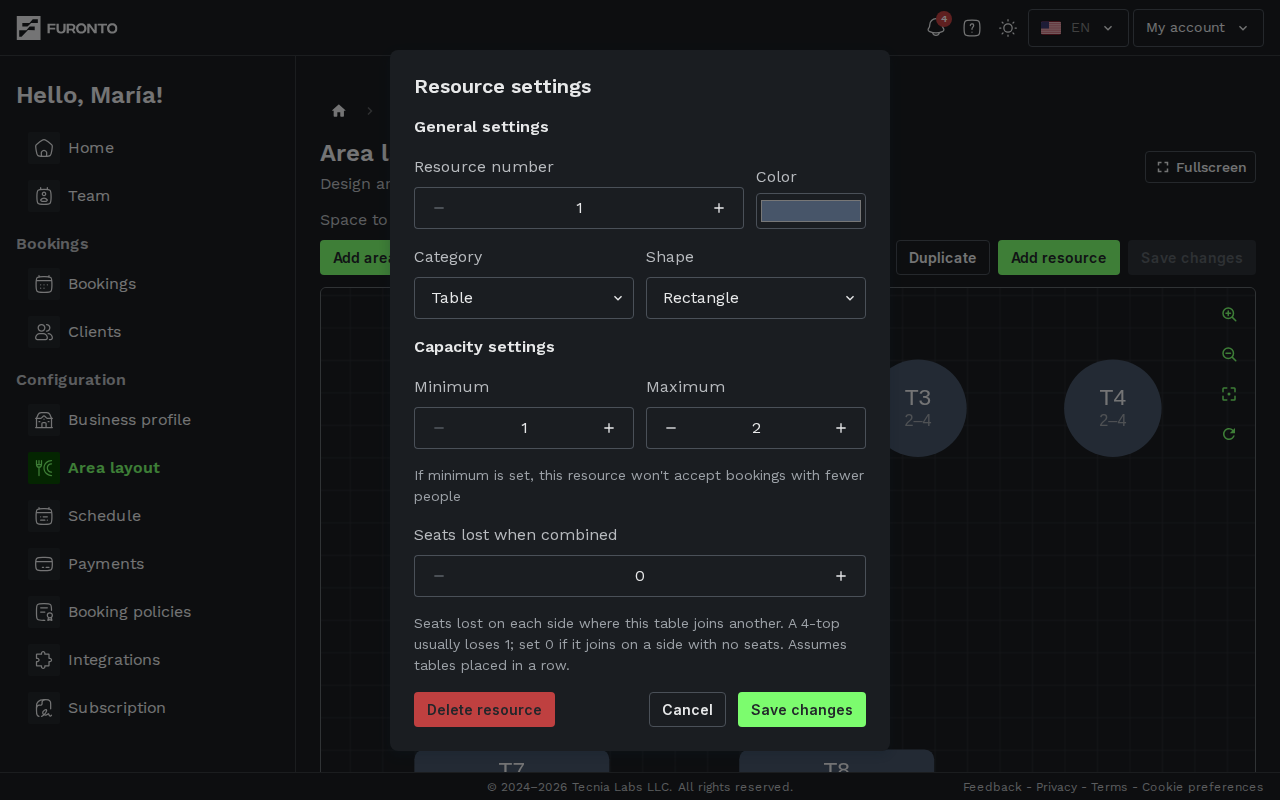
If you set a minimum of 4 for a large table, the system won't let a couple book it — protecting your bigger tables for the larger groups they're designed for. Leave it at 1 if you're happy seating any party size there.
When you push two tables together, the seats on the edges that touch can't be used — two 4-seat tables seat 6, not 8. The system accounts for this so it never offers a combined table to a party that wouldn't actually fit. The default is sensible for most tables (a 4-seater loses 1 per joined side; a small 2-top loses none, since its chairs are on the other sides). Only change it for an unusual table — for example, set it to 0 if your tables push together with no lost seats, or higher for a wide table with a chair on every side. It assumes tables are joined in a straight row.
Two tables in the same area can't share the same number. If you try to save a duplicate, the system will flag it and ask you to pick a different one.
Step 5: Save your changes
When you've finished arranging and configuring tables, click the green Save changes button at the top-right. It stays greyed out until you've made a change, then turns green once there's something to save.
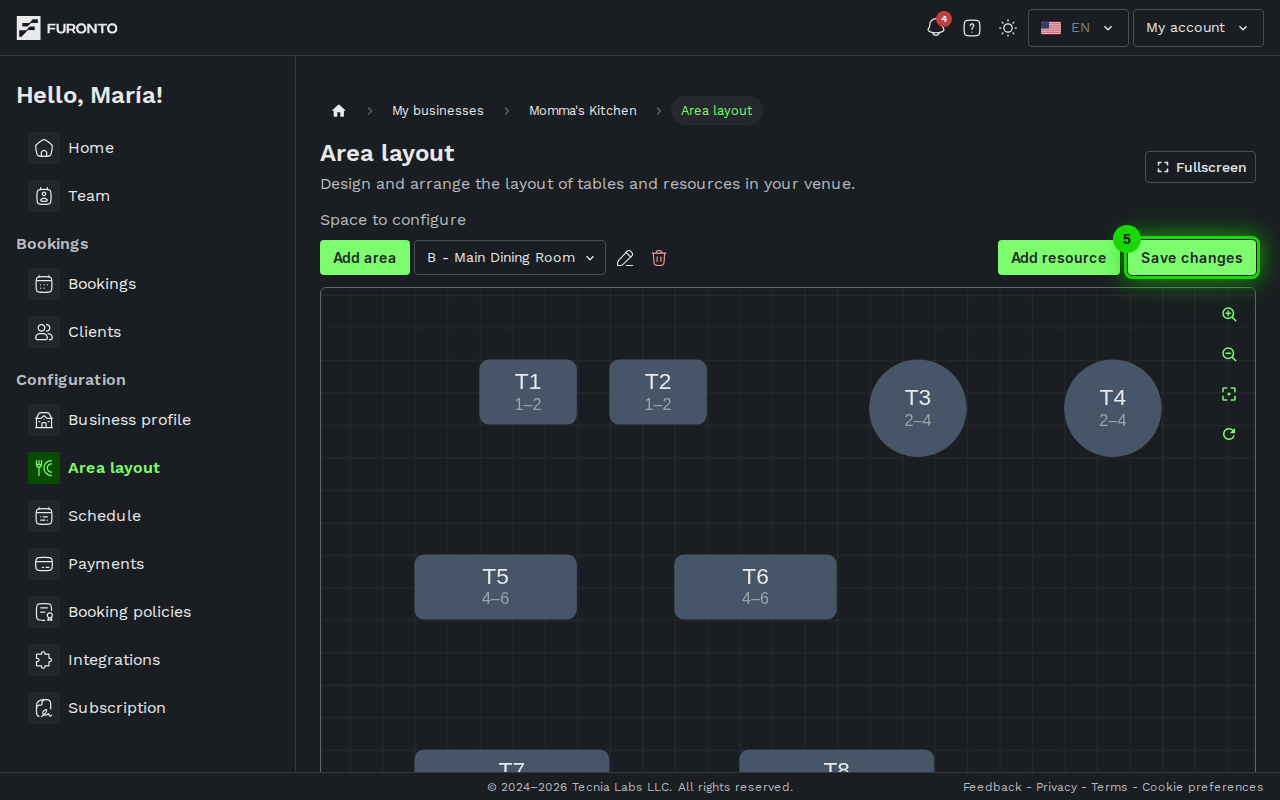
If you start editing one area and then switch to another without saving, you'll get a warning. Save first, or your edits will be discarded.
Tips and best practices
- Mirror your real venue layout — The closer your canvas matches the actual room, the easier it is for staff to spot the right table when a booking comes in.
- Use combinable tables for flexibility — Two tables of the same type next to each other give you the option to seat a larger group without losing the ability to use them separately on quieter nights. The combined size accounts for seats lost where they touch, so what's offered online is what will actually fit.
- Go fullscreen for big layouts — Click the fullscreen icon at the top-right to give yourself more room to work. Press Esc to exit.
- Set realistic capacity ranges — A table that fits 4 comfortably might squeeze in 6, but the experience suffers. Set your maximum to what you're actually happy seating.
- Save often — Even though the system warns you about unsaved changes, it's safer to save after each batch of edits rather than risk losing a long session of work.
Troubleshooting
My table won't move where I want it to
Solution: Tables can't overlap, so if there's another table in the way, they'll bump apart. Move the other table first, or try a slightly different position. Tables also snap to a grid, so they may land a few pixels off where you dropped them — that's intentional and keeps everything aligned.
The save button stays grayed out
Solution: The button is only active when you've made a change. If you opened the page and didn't move or edit anything, there's nothing to save. Try moving a table or editing its number, and the button will turn green.
I deleted an area by accident
Solution: Areas can't be restored once deleted. The system only lets you delete an area when it's not used by any active schedule, so the bookings themselves are safe — but the area's tables are gone. You'll need to recreate the area and add the tables back.
A table number was already used and I can't save
Solution: Each table inside the same area needs its own number. Open the table that's flagged, change its number to one that isn't taken, and try saving again. Numbers can repeat across different areas (table 1 in Indoor and table 1 in Patio is fine).
My layout looks blank on the booking page
Solution: Save your changes before checking the booking page — the platform only uses what's been saved. If you've already saved and tables still don't show up, refresh your public booking page.
Related pages
- Bookings — Manage individual bookings and assign them to the tables you configured here
- Schedule availability — Connect each area to the service hours when its tables can be booked
- Booking policies — Set advance-booking windows and cancellation rules