Schedule
This is where you define when customers can book with you. You'll set up your services (like lunch and dinner), your regular weekly hours, and any special dates when your availability changes.
Business owners and staff members. You need to be a member of the business to access this page. This is one of the most important setup pages: without a schedule, customers can't book.
Getting there
From your dashboard, click Schedule in the left sidebar.
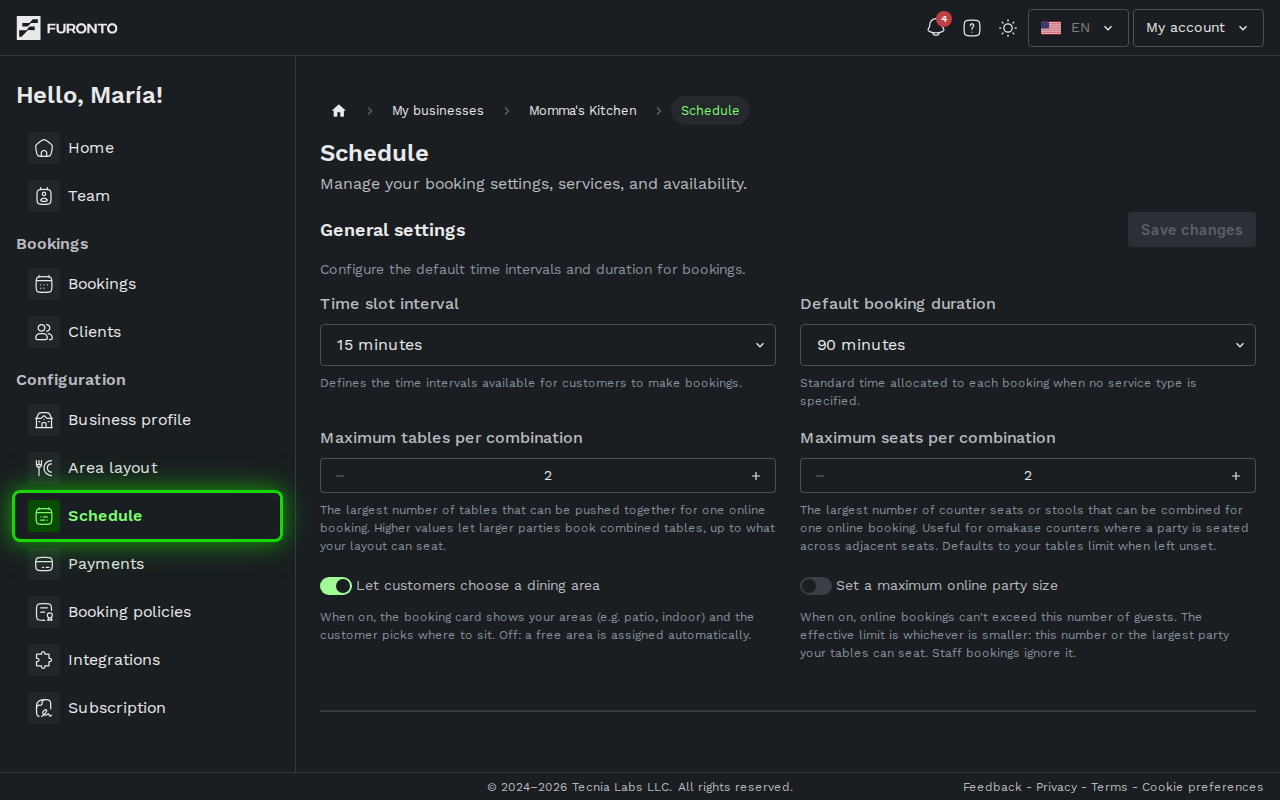
You need to be signed in and have access to the business.
Prerequisites
Before you set up your schedule, it helps to have a few things ready.
You should already have your areas and tables configured on the floor plan. Schedules can be tied to specific areas, so those need to exist first.
How it works
The page is organized top to bottom into general settings, your weekly availability, special dates, and your service types and events. You can fill them in whatever order suits you; the steps below walk through each one.
If you just want customers to book against your opening hours, you can skip step 2 entirely. See operating-hours mode below.
Step 1: Set your general settings
At the top of the page, you'll find these settings:
- Time slot interval: How often booking times are offered. For example,
15 minutesmeans customers can book at 7:00, 7:15, 7:30, and so on. - Default booking duration: How long a typical booking lasts when no specific service type is selected.
- Maximum tables per combination: The largest number of tables that can be pushed together for one online booking. Higher values let bigger parties book combined tables, up to what your layout can actually seat.
- Maximum seats per combination: The largest number of counter seats or stools that can be combined for one online booking. Useful for omakase counters where a party is seated across adjacent seats.
- Let customers choose a dining area: When on, customers booking on your public page see your areas (e.g. patio, indoor) and pick where they want to sit. When off, a free area is assigned automatically. The picker only shows up if you've configured more than one area on your floor plan.
- Set a maximum online party size: When on, online bookings can't exceed the number of guests you set. The effective limit is whichever is smaller: this number or the largest party your tables can seat. Staff bookings ignore it.
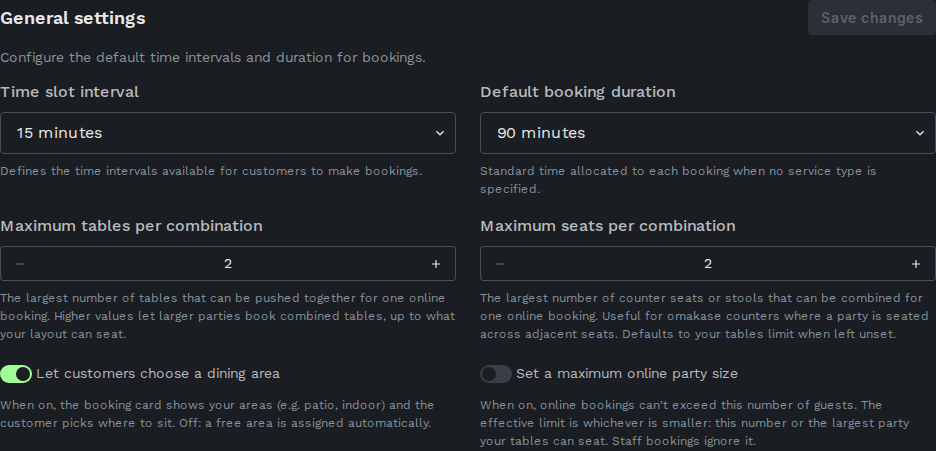
Click the green Save changes button when you're done. The button only activates when you've actually changed something.
A 15-minute slot interval gives customers the most flexibility. Pick longer intervals (30 or 60 minutes) only if you want to group bookings into clear waves.
The business-level toggle is the default. Each service type can override it (see step 2), which is useful when most of your services let customers pick but, say, your tasting menu is chef's-choice seating only.
Step 2: Create your service types
Services are what you offer at different times of day, for example Lunch, Dinner, or Brunch. Each service has its own duration and time window.
Click the Add service type button in the services row.
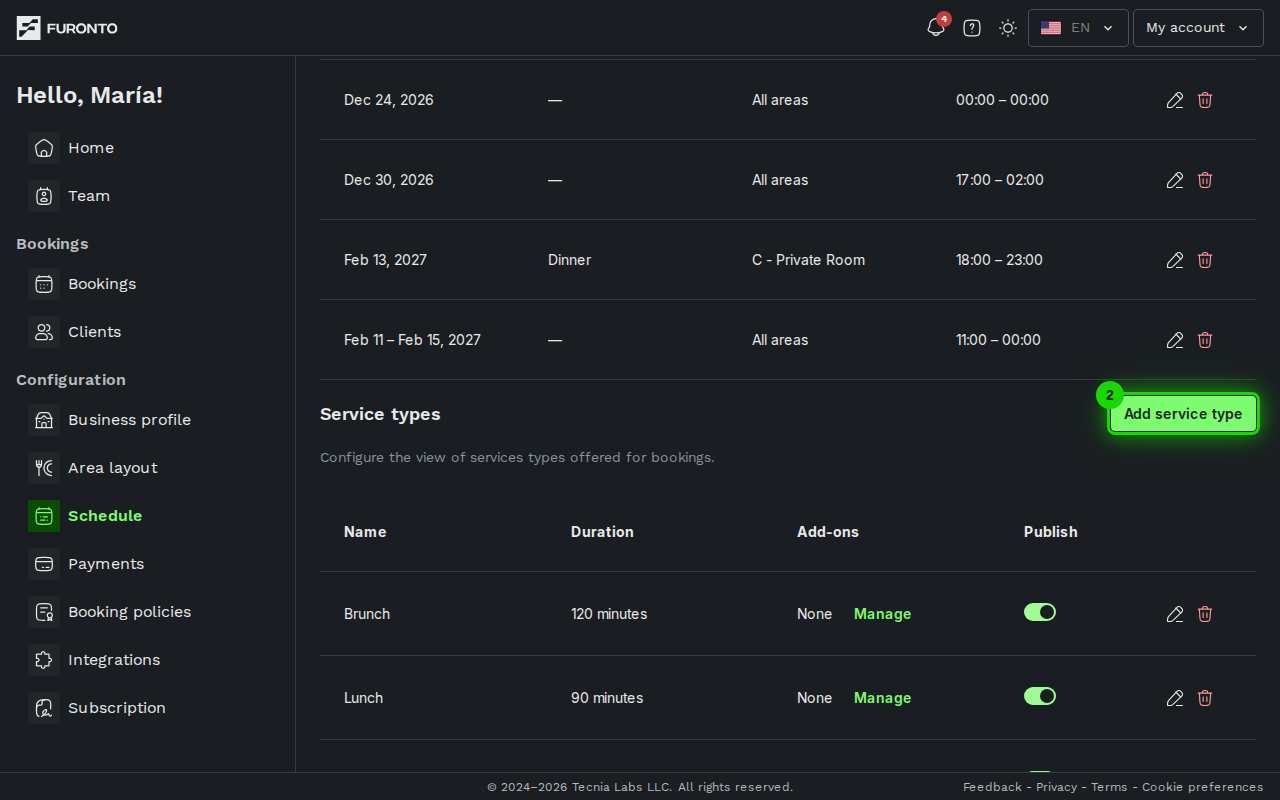
A form will open where you fill in:
- Service name: Like "Lunch" or "Dinner"
- Description (optional): A short note customers might see
- Service duration: How long each booking lasts for this service, in minutes
- Start time and End time: When this service is available during the day
- Areas (optional): Which areas of your business this service runs in. Leave it empty to use all areas.
- Area selection for this service: Defaults to Inherit from business (uses the toggle from step 1). Choose On for this service or Off for this service to override per service.
- Pricing (optional): Choose No pricing, Guarantee, or Full price. See the payments page for how pricing works.
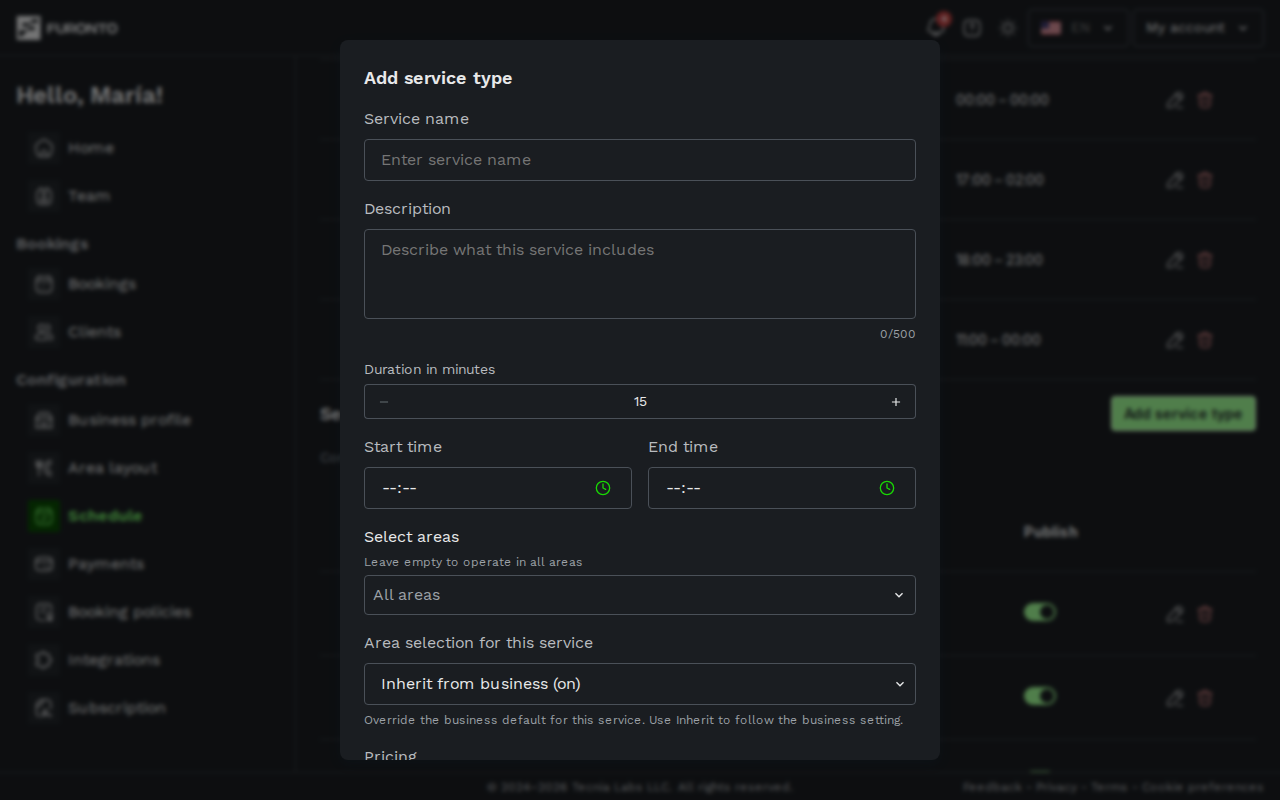
Click Add to create the service. It appears as a new row in the service types table.
Services at different times can share the same areas. You don't need to split areas between services unless you want to.
The service name and description have a language switch above them. Add a translation and customers reading that language see it; leave it empty and they see what you wrote. See writing for customers who read another language.
Step 3: Toggle services on and off
Each row in the service types table has a Publish toggle. Green means Published (customers can book it) and gray means Unpublished (hidden from customers).
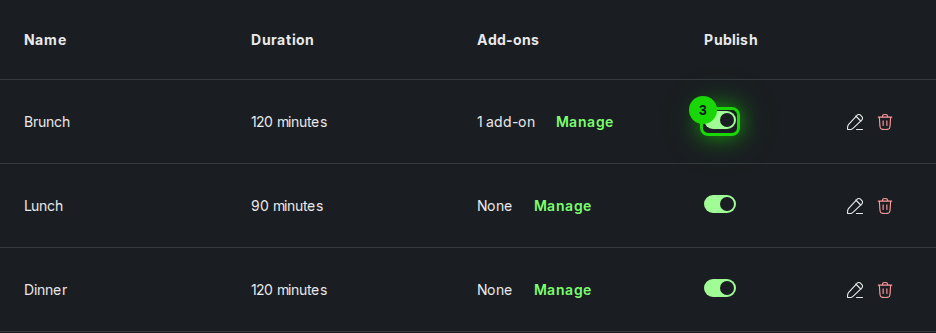
The toggle takes effect right away. There's no separate save step for publishing a service. Flip it on and customers can book it; flip it off and it disappears from your public page.
Events have the same Publish toggle in the events table. An unpublished event stays hidden until you turn it on.
Step 4: Create events (optional)
Events are one-time or special offerings, like a New Year's dinner, a themed night, or a private tasting. Unlike regular services that repeat weekly, events happen on a specific date.
Scroll down to the Events section and click Add event.
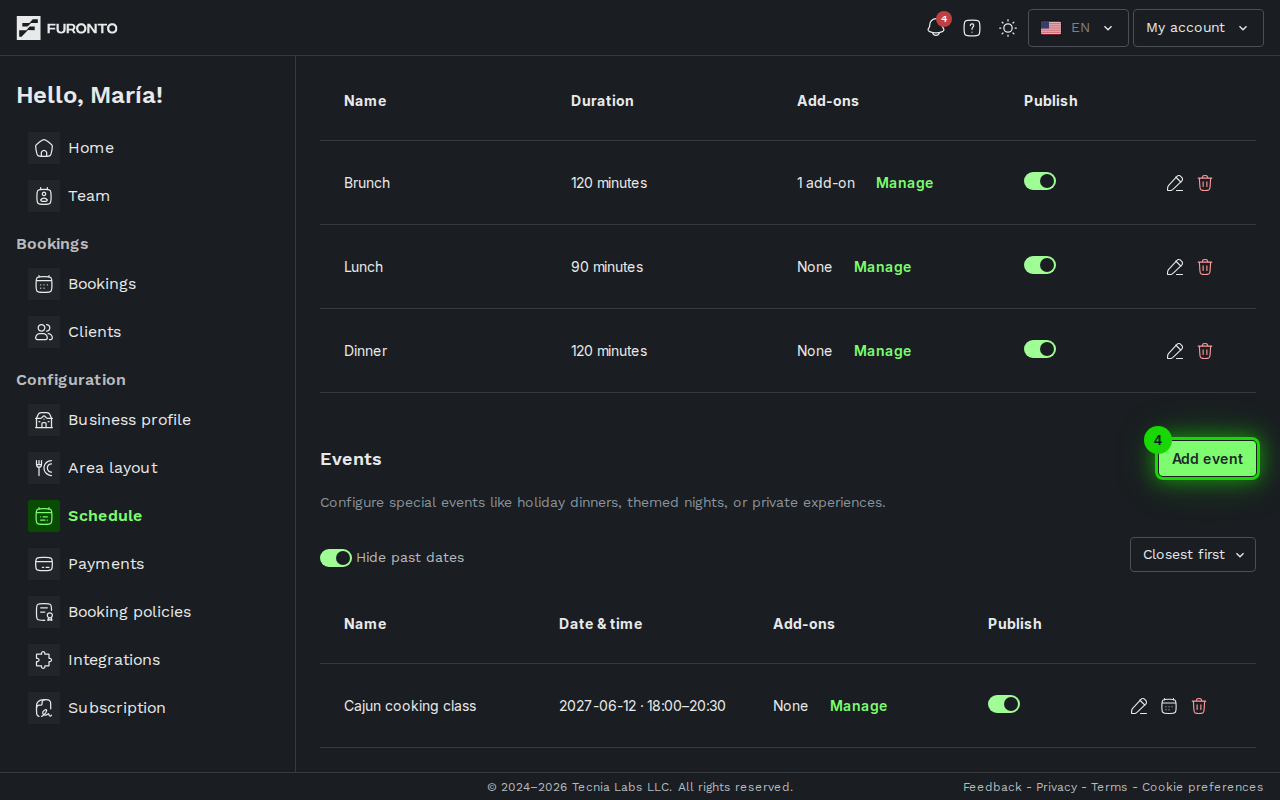
The form is similar to a service, but with an event date field. The event's duration is calculated automatically from its start and end time.
An event runs on its own start and end time, even outside your weekly availability, so you can hold a late tasting or open on a day you are usually closed. A special date that closes the whole day, or closes that event, still closes it.
You can also add up to four event images right in the form: drag them onto the image area or click to browse, and drag the thumbnails to set the order customers will see. The photos upload when you save the event, so they stay editable (or removable) until then. If you skip them now, you can always add them later by editing the event.
Events are great for private experiences, themed nights, or holiday specials. You can set a different price for events than your regular services.
Step 5: Add your weekly availability
Scroll down to the Configured availabilities section and click Add availability.
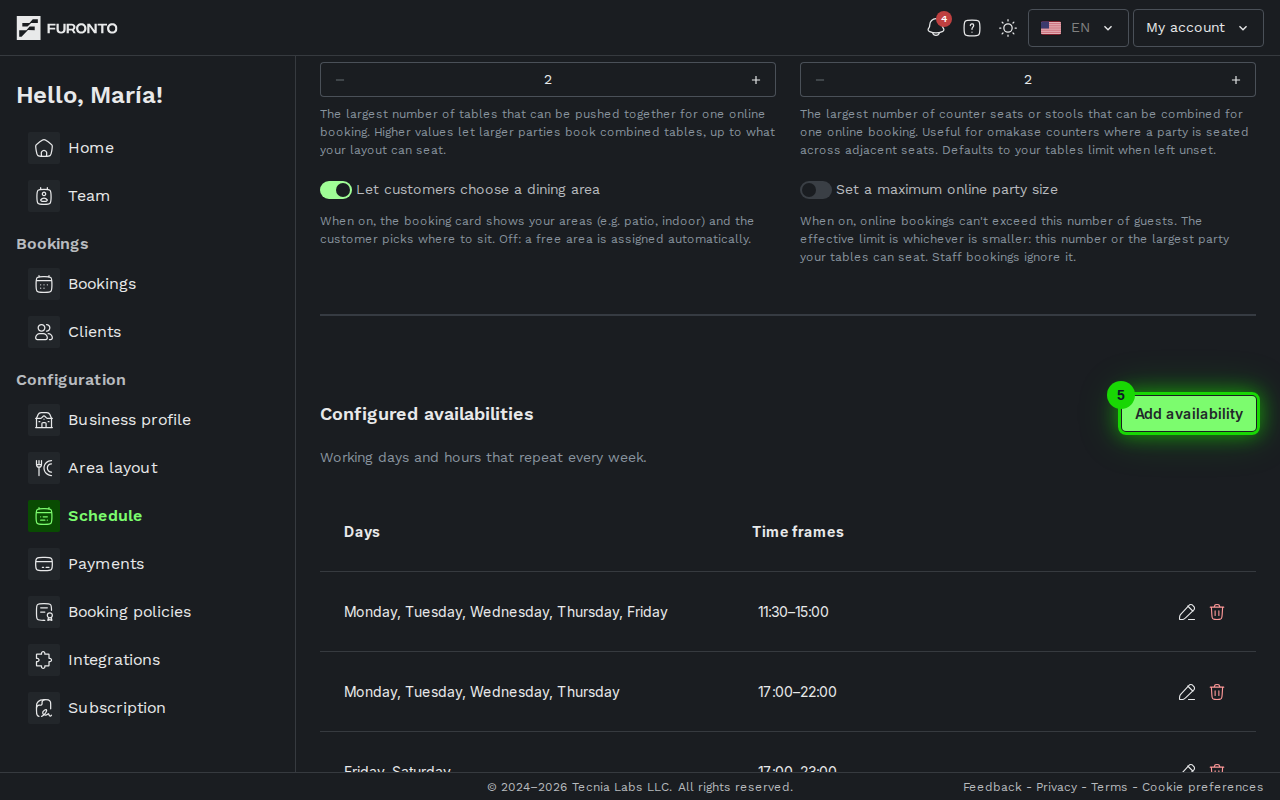
In the modal that opens:
- Select days: Click the days of the week you're open (you can select more than one)
- Working hours: Set the start and end time for those days
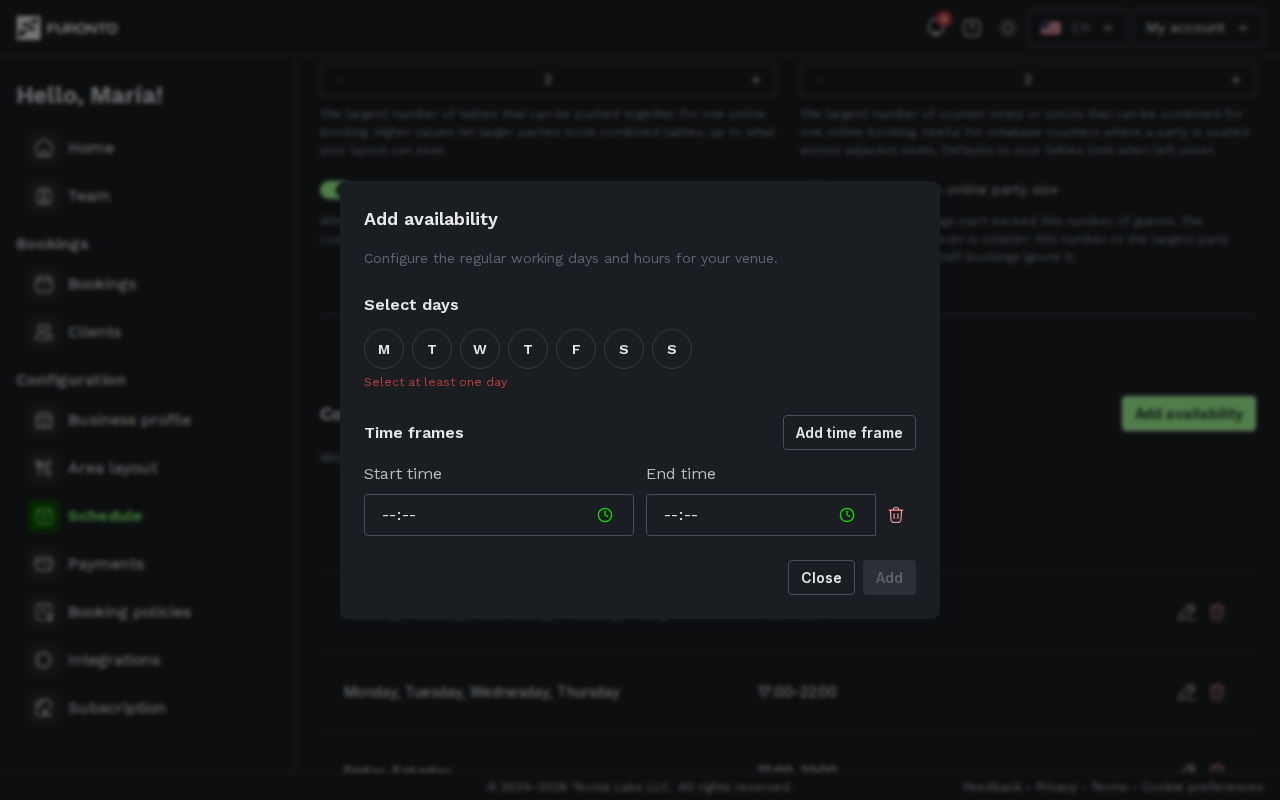
Click Add to save. The availability appears in the Configured availabilities list below.
If you're open different hours on different days (for example, shorter hours on Sunday), create one availability for the weekdays and a separate one for Sunday.
Step 6: Add special dates (optional)
Special dates override your regular weekly availability on specific days. Use them for holidays, closures, or events with different hours.
Scroll to the Special dates section and click Add special date.
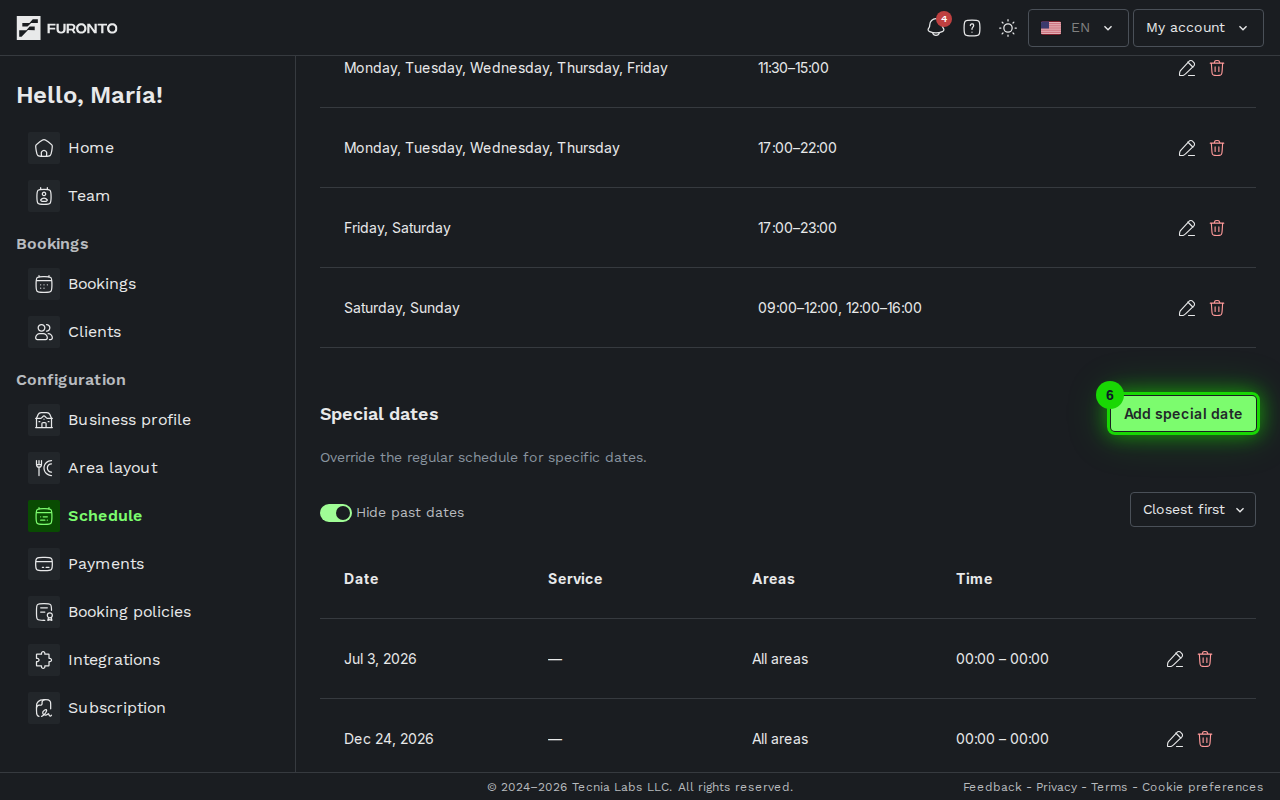
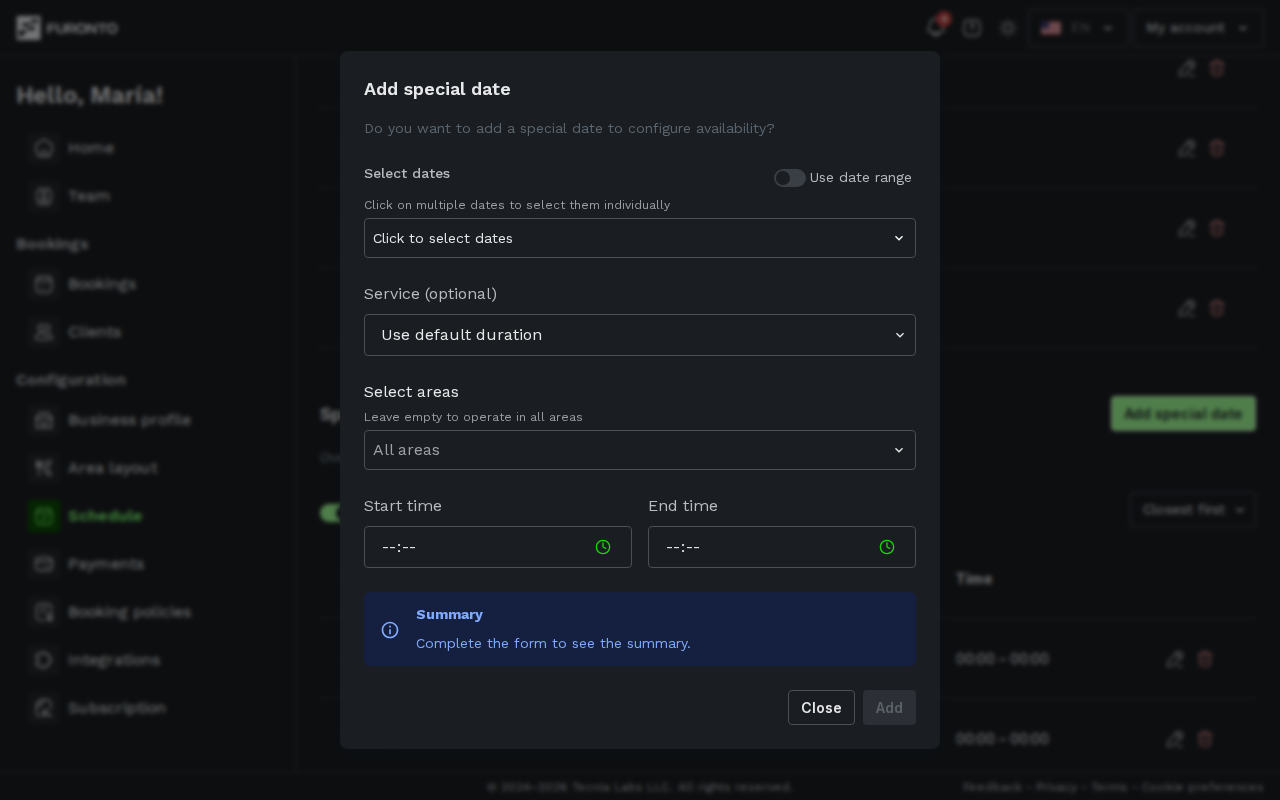
In the modal you can:
- Select a single date, multiple dates, or a date range
- Set different hours for those dates
- Choose which service type or duration applies
- Choose which areas are affected
On a special date, your regular weekly hours are replaced. If you forget to add a special date for a holiday, customers will see your regular hours and may try to book.
Step 7: Edit or remove schedules
Every availability and special date has edit and delete icons on the right. Click the pencil to edit, or the red trash icon to remove.
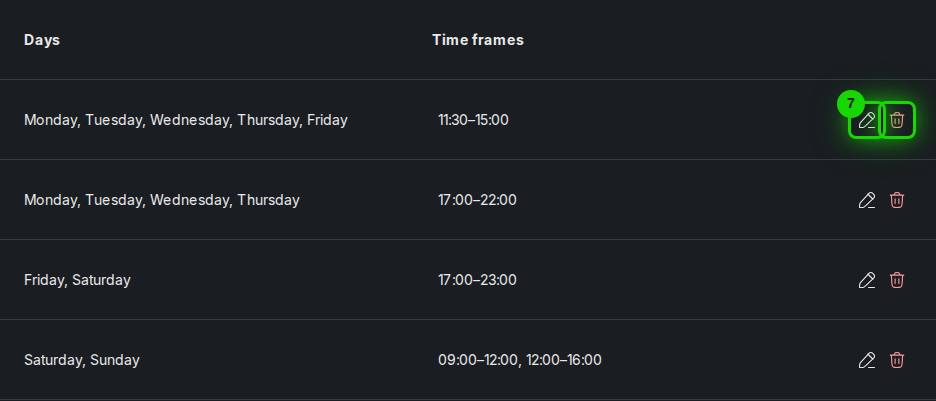
If you delete an availability that has existing bookings, you'll be asked what to do with them. Choose carefully: cancelling bookings notifies the customers.
Operating-hours mode: booking without service types
You don't need service types at all. A business with a complete profile, a floor plan, a weekly schedule, and booking policies is publishable on its own: customers book against your operating hours and the default booking duration from step 1.
Casual, continuous-service businesses. Cantinas, comedores, neighborhood cafés, walk-in friendly diners, anywhere customers come to "have a meal" rather than book a specific seating or menu.
In this mode the booking form skips the service-type step entirely: customers pick a party size, a date, and a time. The available times come from your weekly availability (step 5), divided by your default booking duration.
For example, if you're open 12:00 to 22:00 with a 60-minute default duration and a 15-minute slot interval, customers see times every 15 minutes from 12:00 to 21:00. Each booking holds the table for one hour.
When to add service types later
You can stay in operating-hours mode forever, or add service types whenever it suits you. The moment you create your first service type, the booking form starts showing the picker, with no further configuration needed. Existing bookings made in operating-hours mode aren't affected.
Add service types when you want to:
- Offer different durations at different times of day (a 90-minute lunch and a 120-minute dinner)
- Restrict certain services to specific areas (brunch only on the terrace)
- Charge a deposit or a per-person guarantee for some experiences but not others
- Run events with fixed dates and capacity
Cancellations and no-shows
Operating-hours bookings follow your business-wide booking policies. Customers can cancel within the cancellation window you set; no-shows are tracked the same way as any other booking.
If you've configured a guarantee at the business level, it applies to operating-hours bookings too. Without one, the bookings are free.
Add-ons and menu groups
Each service or event row has a Manage link in the Add-ons column. Add-ons are the extras customers pick while booking: a wine pairing, a shareable starter, a fixed menu.
For each add-on you set a name, optional description, a price with its currency, and:
- Charge type: Guarantee (rolls into the booking hold, charged only on no-show) or Full price (charged at booking).
- Per person: the price multiplies by the party size. Per-person add-ons are picked once per booking.
- Required: customers must include it to book.
- Maximum quantity: caps how many units one booking can order (up to 99). Leave it empty for no cap. Not available for per-person add-ons.
Taking an add-on off the menu
An add-on you're not serving right now, like a seasonal dish out of season or a supplier gap, doesn't have to be deleted. Use the eye button on the add-on row to take it off the menu. Customers stop seeing it and can't book it, while the add-on keeps its price, description and group so putting it back is one click.
Off-menu add-ons stay in your list with an Off the menu label, so you can always tell why something isn't being ordered.
If bookings already include the add-on, taking it off the menu is refused the same way deleting it is, and you'll be offered the cancellation options for those bookings. That's deliberate: those customers ordered it, and an off-menu add-on would otherwise block every later change to their booking. Putting an add-on back on the menu is never blocked.
Menu groups
Groups let every guest pick one option from a set: the classic "choose your menu" case with, say, a standard, premium and kids menu. In the manage add-ons window, create a group with a name and choose whether it's Required, then assign add-ons to it with the Group selector on the add-on form. Group members can't be per-person, because the group already counts guests.
How customers see it: for a required group, the quantities across the group's options must add up to the party size before they can book (two standard + one kids menu for a party of three). An optional group can be skipped entirely, but once engaged it must also cover every guest. Each option's maximum quantity still applies inside the group, so "only four kids' menus tonight" is one field away.
To archive a group, first move its add-ons out of it (change or clear their Group selector). A group that still has add-ons can't be archived.
Tips and best practices
- Start simple: Set up one service (like "Dinner") and one weekly availability. Add more as you need them.
- Use event dates for holidays: Rather than editing your weekly schedule for a single holiday, create a special date. It's easier to reverse.
- Assign areas thoughtfully: If a service only runs in certain areas (like a terrace only in summer), set those areas on the service.
- Test with a preview booking: After setting up your schedule, open your public business profile in another tab and try booking. You'll see exactly what customers see.
- Keep service times realistic: If your kitchen closes at 10pm, don't publish a service that runs until 11pm. Customers booking late may be disappointed.
Troubleshooting
No time slots are showing on my booking page
Solution: Make sure you have at least one published service and at least one weekly availability for the days you're open. Unpublished services don't appear to customers.
I get a "schedule conflict" error when adding availability
Solution: You already have an availability that covers the same days and overlapping hours. Edit the existing one instead of creating a new one, or choose different times.
I get "a special schedule already exists" when adding a special date
Solution: Another special date already covers that day in a way the two can't combine. Two closures for the same service (or two whole-day closures) repeat each other, an hours change for something you've already closed would never apply, and two hours changes for the same service can't overlap in time and area. Edit or delete the existing special date instead. Special dates for different services can share a day, so you can change the day's hours and close a single service, or set different hours for one service on top of the day's hours.
My special date doesn't appear on the booking page
Solution: Check that the date is in the future and that it's saved in the Special dates list. If the area you selected is different from the service's areas, the special date won't apply.
The save button is grayed out
Solution: The button only activates after you change a setting or toggle. If you haven't changed anything, there's nothing to save.
Related pages
- Floor plan: Areas and tables are the foundation of your schedule
- Payments: Configure pricing, guarantees, and authorization holds
- Booking flow: See how customers use your schedule to book
- Bookings: Manage the bookings that come from your schedule