Booking policies
Every business has its own rhythm. This page is where you set the rules of the game — how far ahead customers can reserve, the minimum notice they must give before a booking starts, how much grace time you give someone who arrives late, and how late they can cancel. Tune these four settings once and they apply to every booking that comes through your business.
Business owners and managers. These policies directly shape the experience your customers have when they reserve a table — and they affect when a guarantee can be charged. You need owner or manager access to open this page.
Getting there
From your dashboard, click Booking policies in the left sidebar, under Configuration.
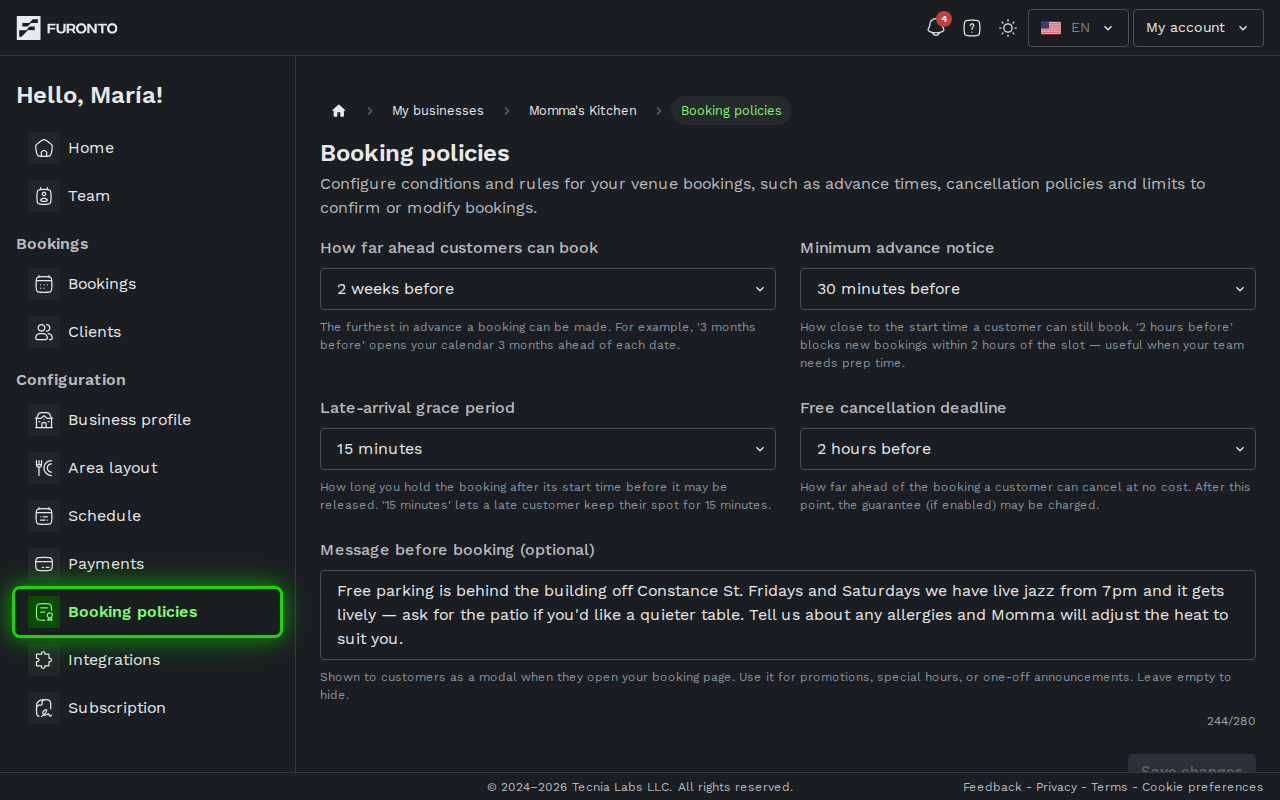
You need to be signed in and have access to the business.
How it works
The page has four dropdowns, laid out in two rows of two. Each one controls a different moment in the booking lifecycle. Pick an option from each, then click Save changes to apply them.
Step 1: Set how far ahead customers can book
The top-left dropdown, How far ahead customers can book, controls how far in advance the booking window opens. If you pick 2 weeks before, customers can book any slot up to two weeks away — anything further out isn't open yet.
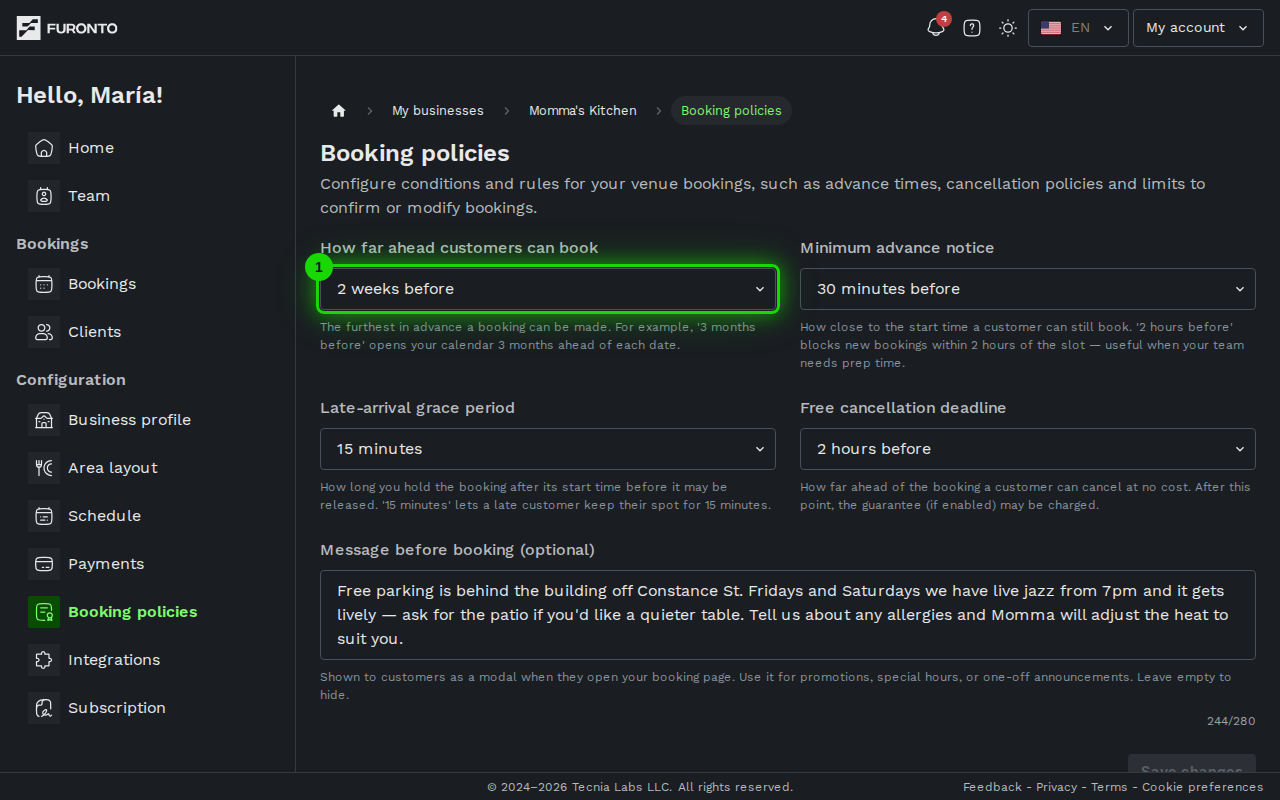
A short window (a few hours) keeps bookings close to the date, which tends to reduce no-shows. A long window (weeks or months) lets customers plan ahead and is handy for special occasions.
Step 2: Set the minimum advance notice
The top-right dropdown, Minimum advance notice, blocks bookings that arrive too close to the start time. If you pick 30 minutes before, a customer trying to book a 7 PM table at 6:45 PM will be told it's too late. Set it to No minimum to keep last-minute bookings open.
No minimum means exactly that — no minimum notice. It never lets a customer book a time that has already passed: a 7 PM slot stops accepting customer bookings at 7 PM, whatever this setting says.
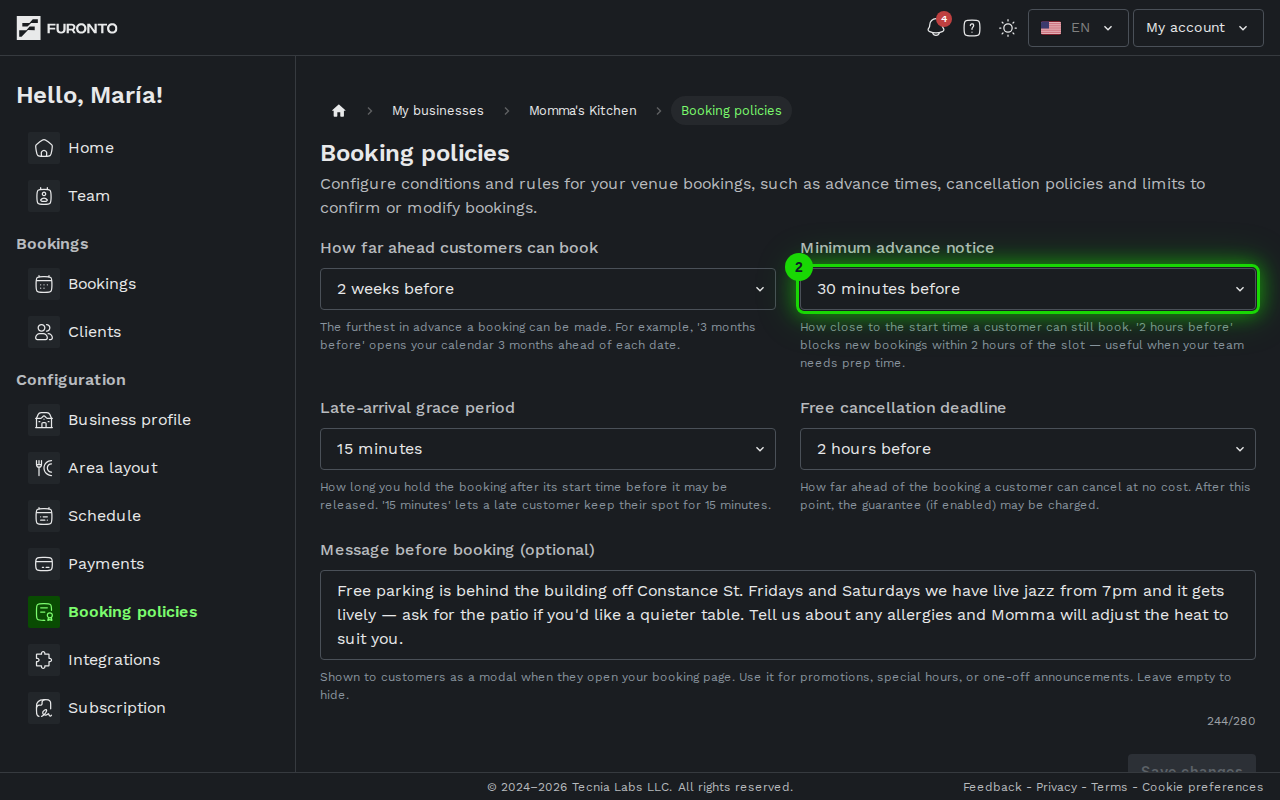
Use this when your kitchen or team needs prep time — it stops a customer from "booking" a table that starts in five minutes, before you can even react.
Staff bookings (yours and your team's) bypass this rule. If you need to seat a customer minutes before a booking starts, you can still record it from the dashboard.
Step 3: Set your late-arrival grace period
The bottom-left dropdown, Late-arrival grace period, is the grace period you give late arrivals. If it's set to 15 minutes and a customer has a 7 PM booking, they have until 7:15 PM to show up before the table may be released for other customers.
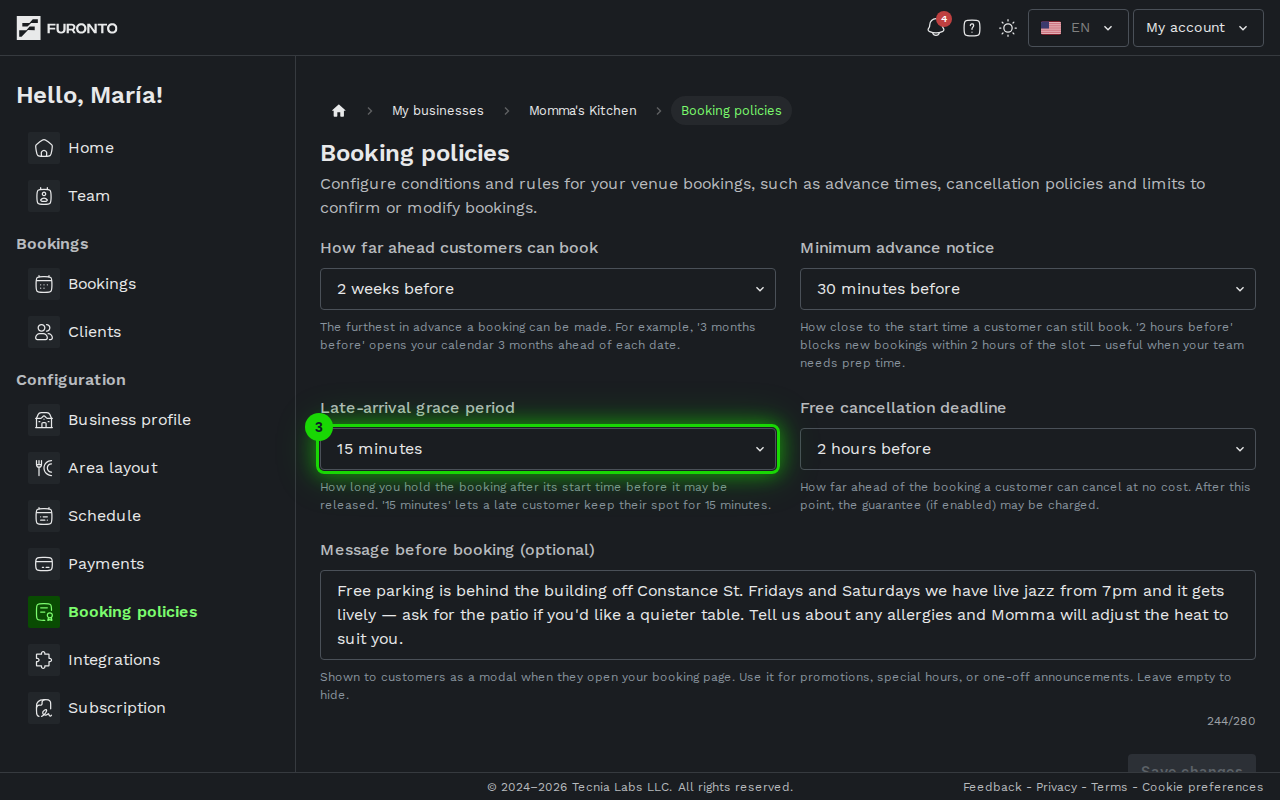
A tolerance of 10 to 15 minutes is a good default. Less than that feels strict to customers; more than that means empty tables during peak hours.
Step 4: Set your cancellation window
The bottom-right dropdown, Free cancellation deadline, controls how late a customer can cancel without penalty. After this deadline passes, cancellations are still possible — but if you have a guarantee set up, the guarantee may be charged.
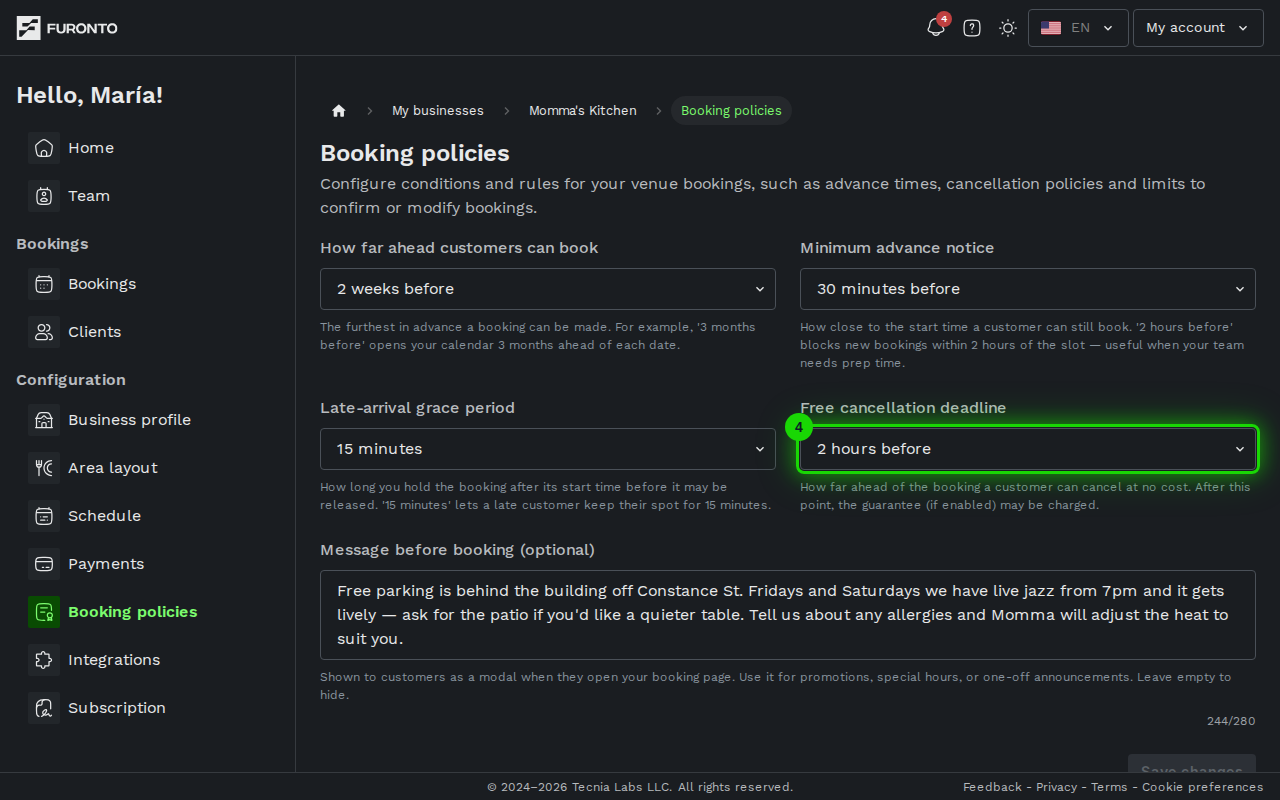
If you've turned on a payment guarantee, you must pick a cancellation window here — the No limit option is disabled in that case. Without a cutoff time, the guarantee has no meaning, because customers could cancel at the last minute for free.
Step 5: Save your changes
Once you're happy with all four settings, click the Save changes button at the bottom. A confirmation message appears when your policies are saved. Until you click save, nothing is applied — and the button stays greyed out until you actually change something.
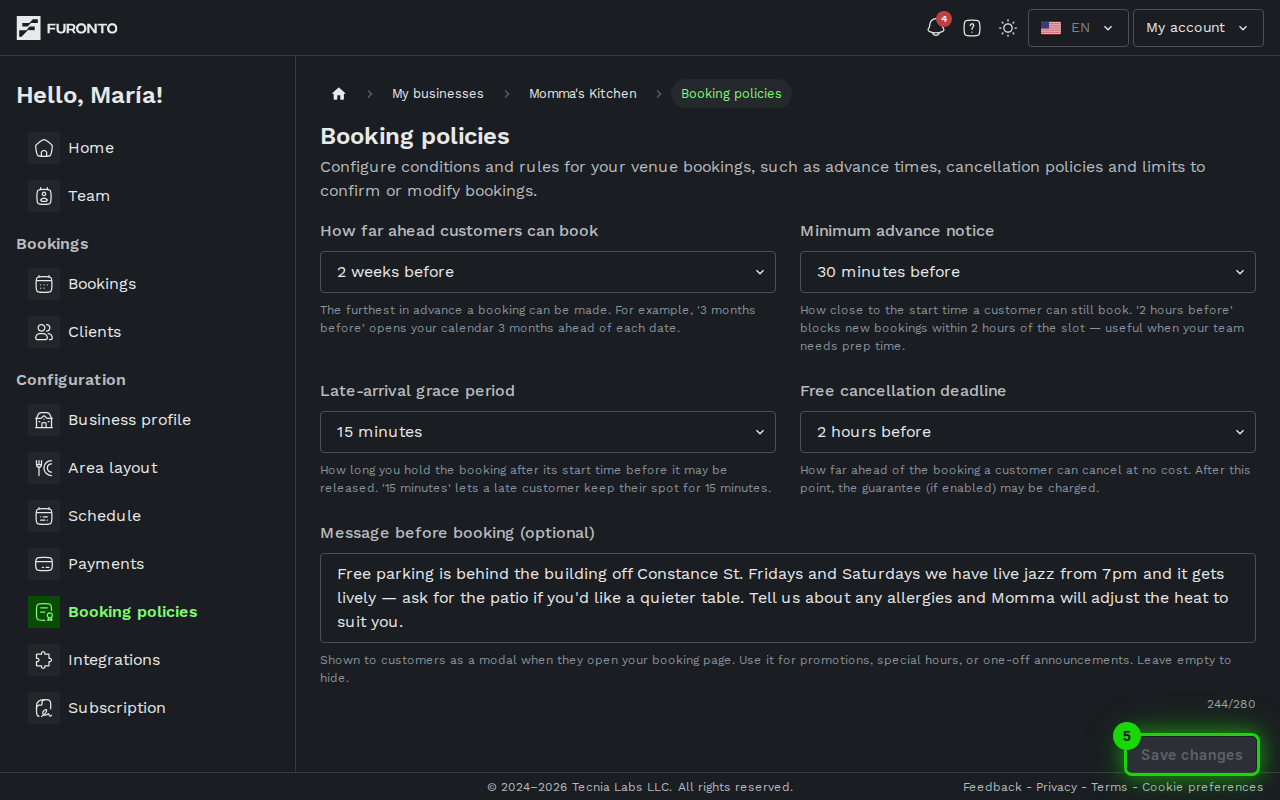
If you leave the page with unsaved changes, you'll get a warning. This prevents you from accidentally losing your work.
Tips and best practices
- Align these settings with how busy you are. A popular spot with a waiting list can afford shorter tolerance and tighter cancellation windows. A quieter venue benefits from being flexible.
- Review your policies every few months. As your customer base grows, what felt reasonable at the start may need adjusting.
- Think from the customer's side too. A 24-hour cancellation window protects you, but it can also discourage first-time visitors. Find the balance that works for your business.
- Pair the cancellation window with your guarantee. If you charge no-shows, the cancellation cutoff is your customer's last chance to cancel for free — make it fair and clearly communicated.
- Update your policies before a big event. Going into a holiday or a special weekend? Tighten the cancellation window a few days ahead to avoid last-minute drop-outs.
Troubleshooting
The save button stays greyed out
Solution: The button only becomes active when you actually change one of the four dropdowns. If none of the values are different from what's already saved, there's nothing to save. Pick a different option and the button will light up.
I can't select "No limit" for cancellations
Solution: This option is disabled because your business has a payment guarantee turned on. A guarantee needs a clear cutoff to make sense, so you'll need to pick a time-based cancellation window. If you don't want one, go to the Payments page and turn off the guarantee first.
My changes didn't save
Solution: Make sure you clicked Save changes. Changing the dropdowns alone doesn't save them — you need to confirm with the button. If you still see an error message, check your internet connection and try again.
The cancellation window feels too short (or too long)
Solution: Come back here any time and pick a different option. Your changes apply to new bookings and future cancellations — past bookings keep the rules that were in place when they were made.